
.svg)


Group Sessions
A group session is one of the three types of events available in Arbox. This type of event is intended for multiple participants. It can be set for recurring days and times, and can also be shown/hidden from clients. Your clients will be able to register for the group session via memberships, punch cards, and one-time payments using the client app and website. Lectures, practices, training sessions, and team meetings are great examples of group sessions.
Follow these steps to easily add your first group session to the schedule:
- In the side menu, click "Schedule" and select "Calendar"
- In the top toolbar, click the blue "Add" button
- Select "Group Session" and click "Next"
- Choose the desired event. You can create a new event that doesn't exist in the list by clicking "Add". You'll need to define a name, description, color, maximum number of participants, and choose if one-time payment will be allowed for it (outside of the membership or punch card the client holds).
- Select a staff member and enter the maximum number of participants for the meeting, then click "Next"
- Choose a date and time for the group meeting. Note - if it's a recurring event, the date you enter will be the first occurrence.
- Choose if the event is one-time or weekly (you can set an end date when the series of meetings in the calendar will stop)
You have several settings to customize the session to your business needs. To access them, click the existing session and choose the edit icon:
.png)
Show Group Session
Define if you prefer to show or hide the session from your clients (suitable for team meetings, internal events, etc):
.png)
Cancellation Policy
You have 3 options to set the terms for cancellation by clients:
- Allow cancellation at any time - Cancel registration up until the start time of the session.
- Allow cancellation up to X hours before the event - This will allow your clients to independently cancel the session up until X hours you define. After this time they will not be able to cancel independently.
- Allow late cancellation up to X hours before the event - When a participant cancels after the defined time, the cancellation will be marked as "Late Cancellation". In this case, the client will not receive a credit for punch count or registration quota for the session.
.png)
Registration Opening
You have 2 options for opening registration for the session:
- No limit (default) - Your clients will be able to register for the session from the moment it is created.
- Registration opens X hours before the start - The session will be shown in the client app but will only open for registration X hours before the start.
.png)
Registration Closing
You have 2 options for closing registration for the session:
- No limit (default) - Registration for the session will remain open until the start time.
- Registration closes X hours before the start - This prevents surprise last-minute additions.
.png)
Minimum Participants
With this setting you can define a minimum number of registrants, X hours before the start time, in order for the session to take place. If not enough participants register, the session will automatically cancel and a cancellation notice will be sent to registered participants via Push and email:
.png)
Online Session
If the session is online, you can enter the Zoom link (or any other platform) and participants will receive the session link after registering. After creation, you can schedule another event, view the group meeting you added, and manage it by clicking the specific session:
.png)
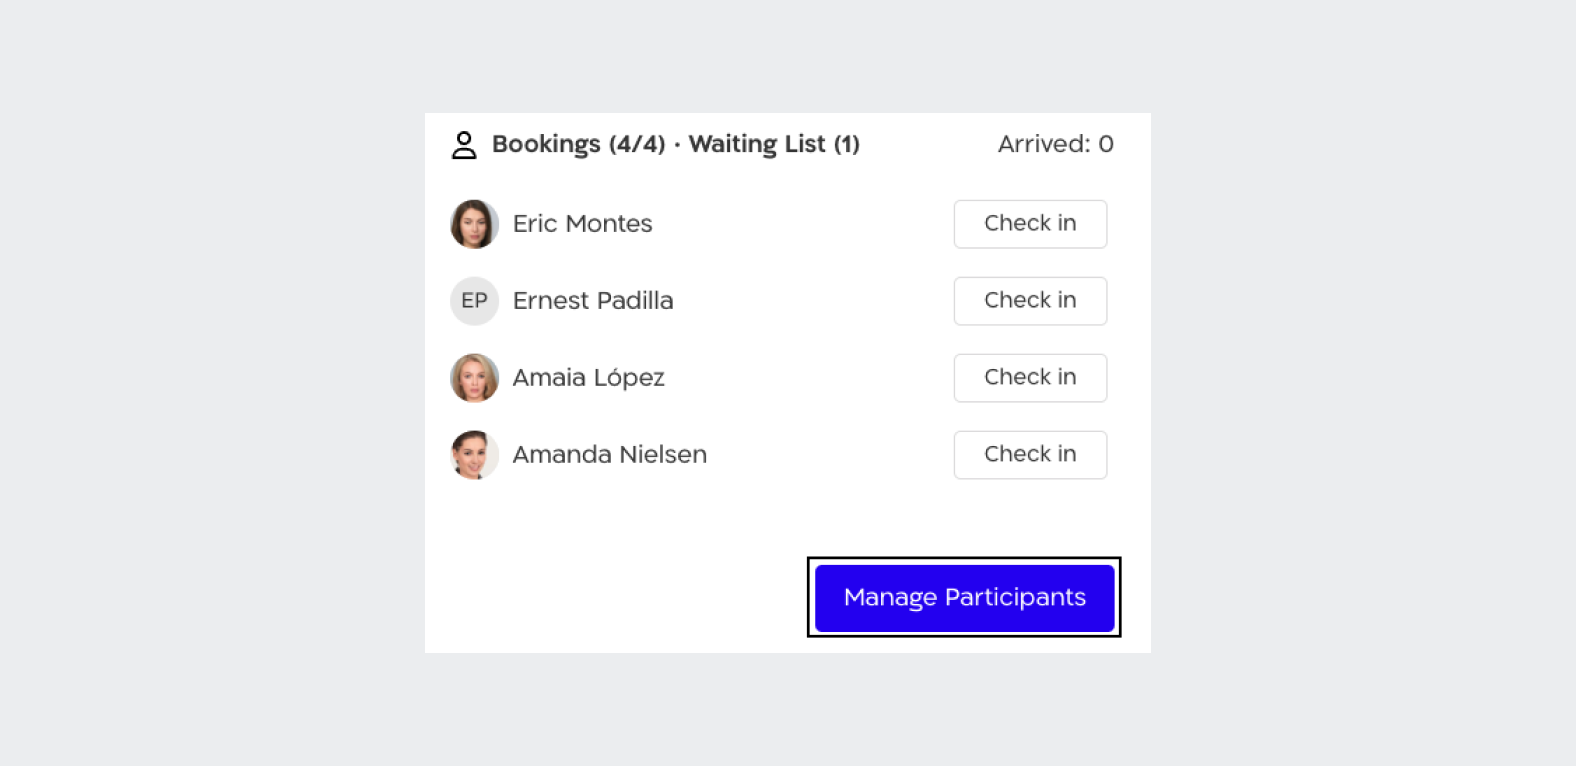
Managing and editing the group session are frequent actions that can be easily performed in your Arbox. After adding the group session to the calendar you'll be able to view its details by clicking the session - this will display:
- Session name
- Day, date and time of session
- Session coach
- Number of registrants
- Client attendance status
Now, to zoom in on the Bookings list, Waitlist, and Cancellations, simply choose "Manage Participants":
Registrations
Clicking the trash icon allows you to choose between two options:
- Delete Registration - Deletes the client from the bookings list without charge or penalty.
- Late Cancellation - Deletes the client from the bookings list after being charged (punch count deducted, registration quota used, etc.) or penalized.
Clicking "Book a new lead" allows you to create and register an interested participant for the specific session. The session will count as a trial meeting for the lead.

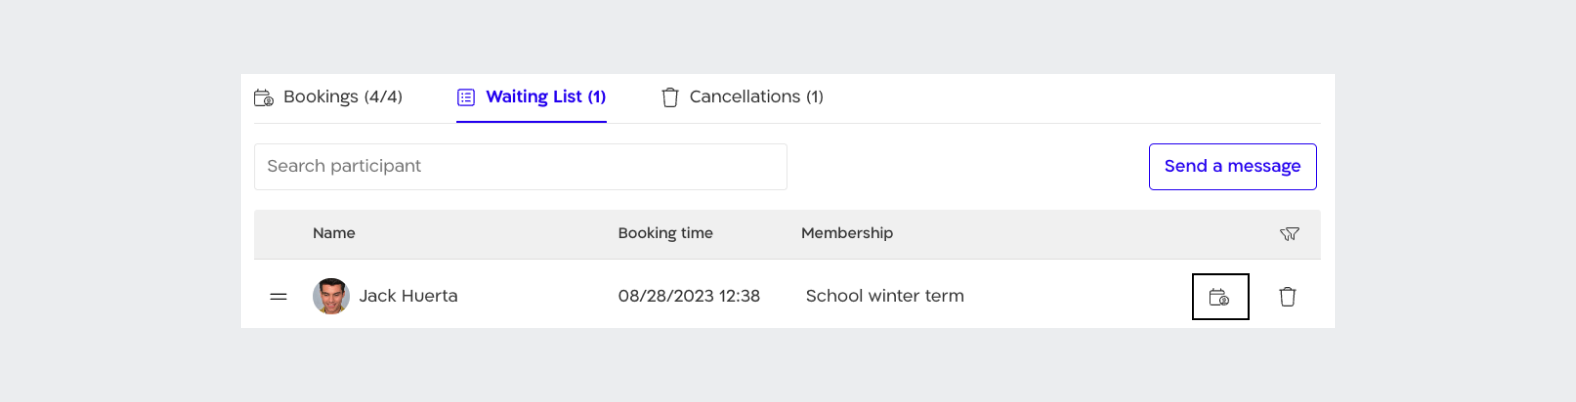
Waitlist
Once the number of registrants reaches your set maximum, your clients will be able to join the waitlist for the group session. You can edit and manage the waitlist in these ways:
- Add clients to the waitlist by searching in the search field.
- Delete clients from the waitlist by clicking the trash icon.
- Move clients from the waitlist to the registrants list by clicking "Add to session bookings".
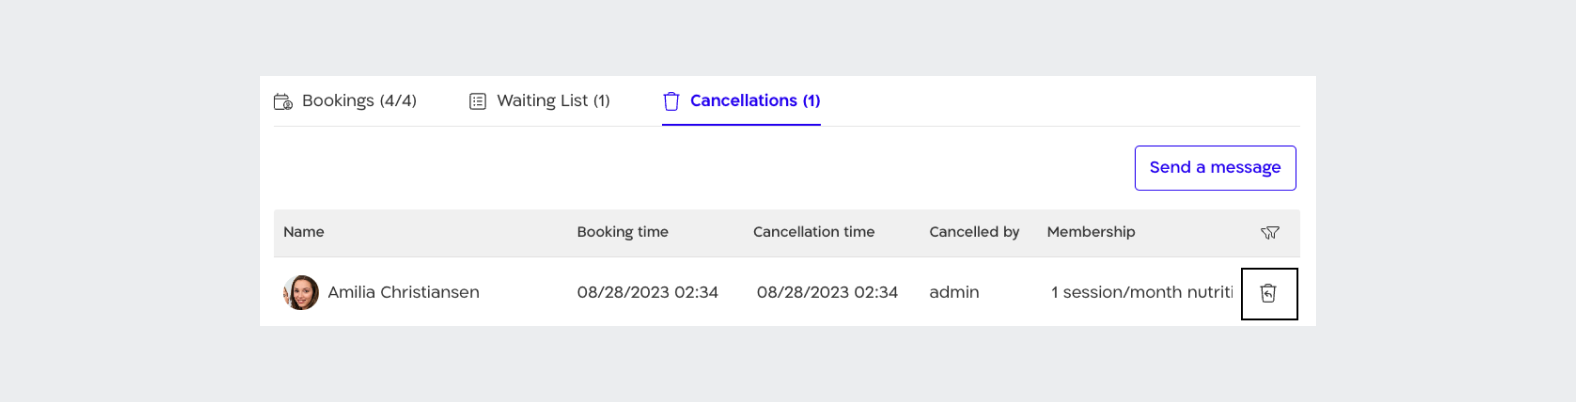
Cancellations Column
This column will show all clients who have cancelled the session, whether a regular or late cancellation. The information shown in the cancellations column is: client name, registration time, cancellation time, who performed the cancellation, and client membership. You can add the client back to the meeting by clicking the restore icon.
.png)
.png)
.png)
.png)


.png)