Zapier and Arbox integration
Zapier lets you connect Arbox to 2,000+ other web services and apps. Automated connections called Zaps, set up in minutes with no coding, can automate your day-to-day tasks and build workflows between apps that otherwise wouldn't be possible.
Each Zap has one app as the trigger, where your information comes from and which causes one or more actions in other apps, where your data gets sent automatically.
Arbox Triggers
- New lead created
- Lead converted to client
- New client created
- A member renewed their membership
- Enrolled from waitlist
- Canceling registration (end-user)
- Credit refusal (recurring plans)
- Registration for X events
- New purchase
- Business entry via QR code and chip
- Mark lead as 'Lost'
- Sign digital form
- X attendance marks
Arbox Actions
- Create new lead
- Create new client
- Create new task
- Create new purchase
- Send message
- Update lead status
- Search client
- Get shcedule
- Create group session
Getting Started with Zapier
Sign up for a free Zapier account, from there you can jump right in.
Note - Using Zapier and Arbox is free but some third part integrations might require a paid Zapier account. You can check the Zapier packages here.
How to connect Arbox to Zapier?
1. Log in to your Zapier account or create a new account.
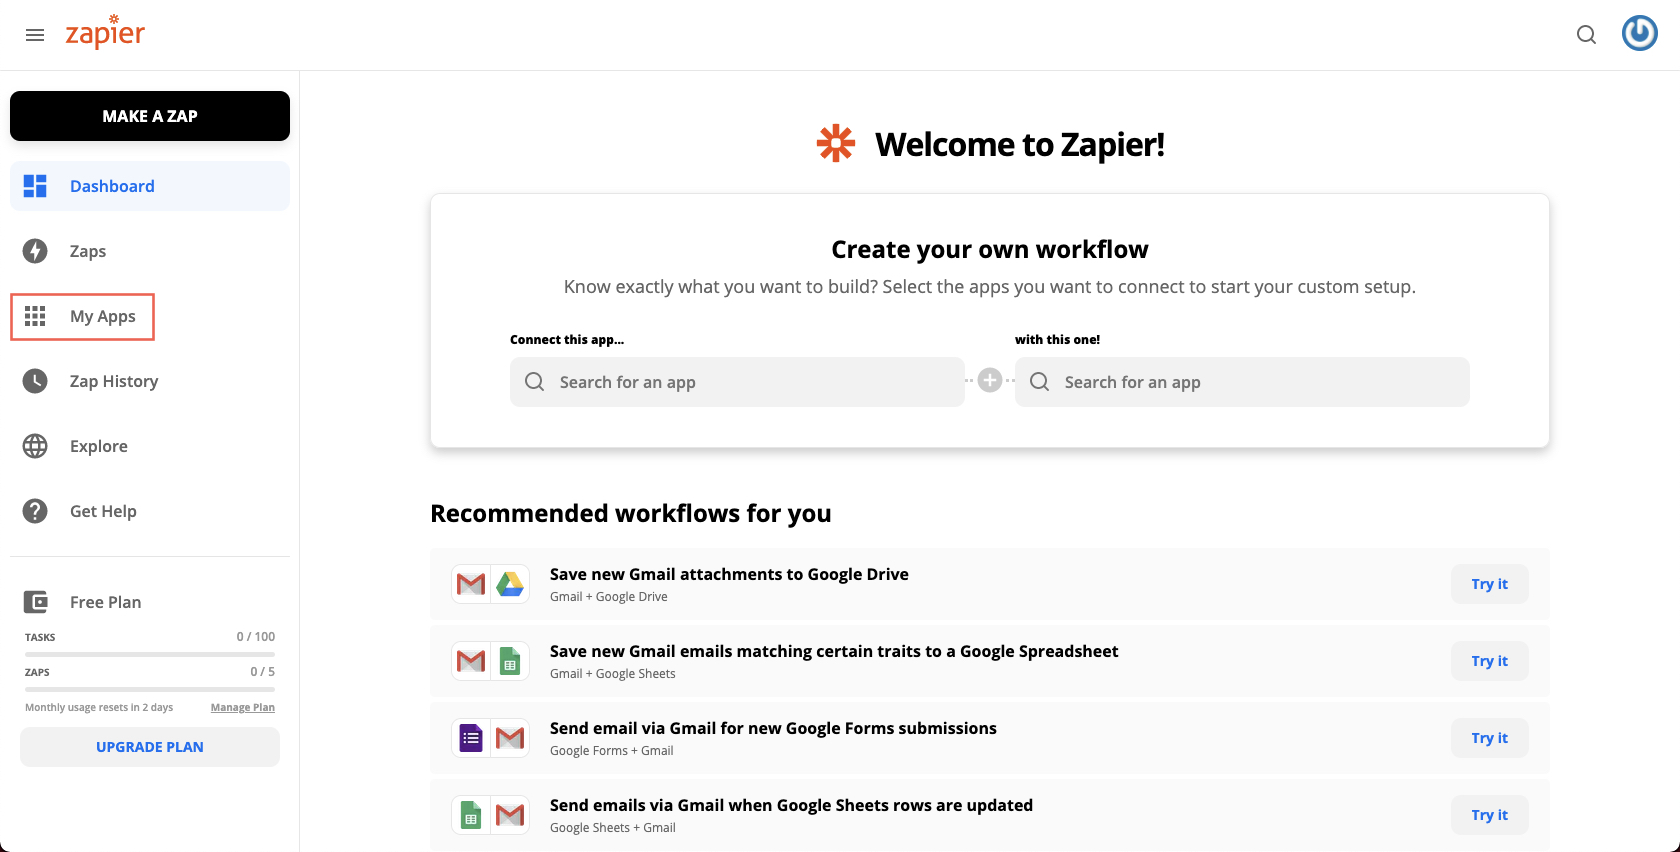
2. Navigate to "My Apps" from the main menu.

3. Click on "Add connection".

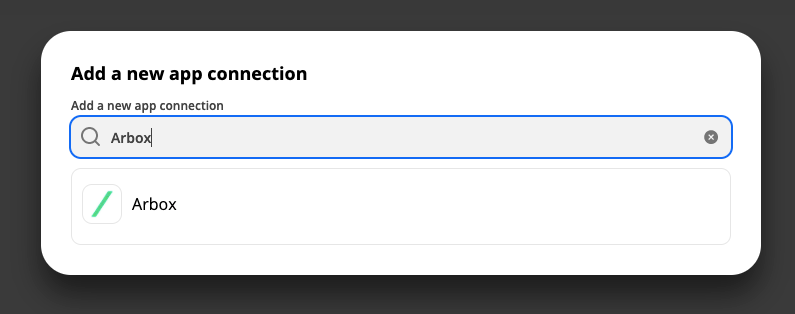
4. Search for and choose "Arbox".

5. In Arbox, go to Settings >> Club Information, and copy your API Key.

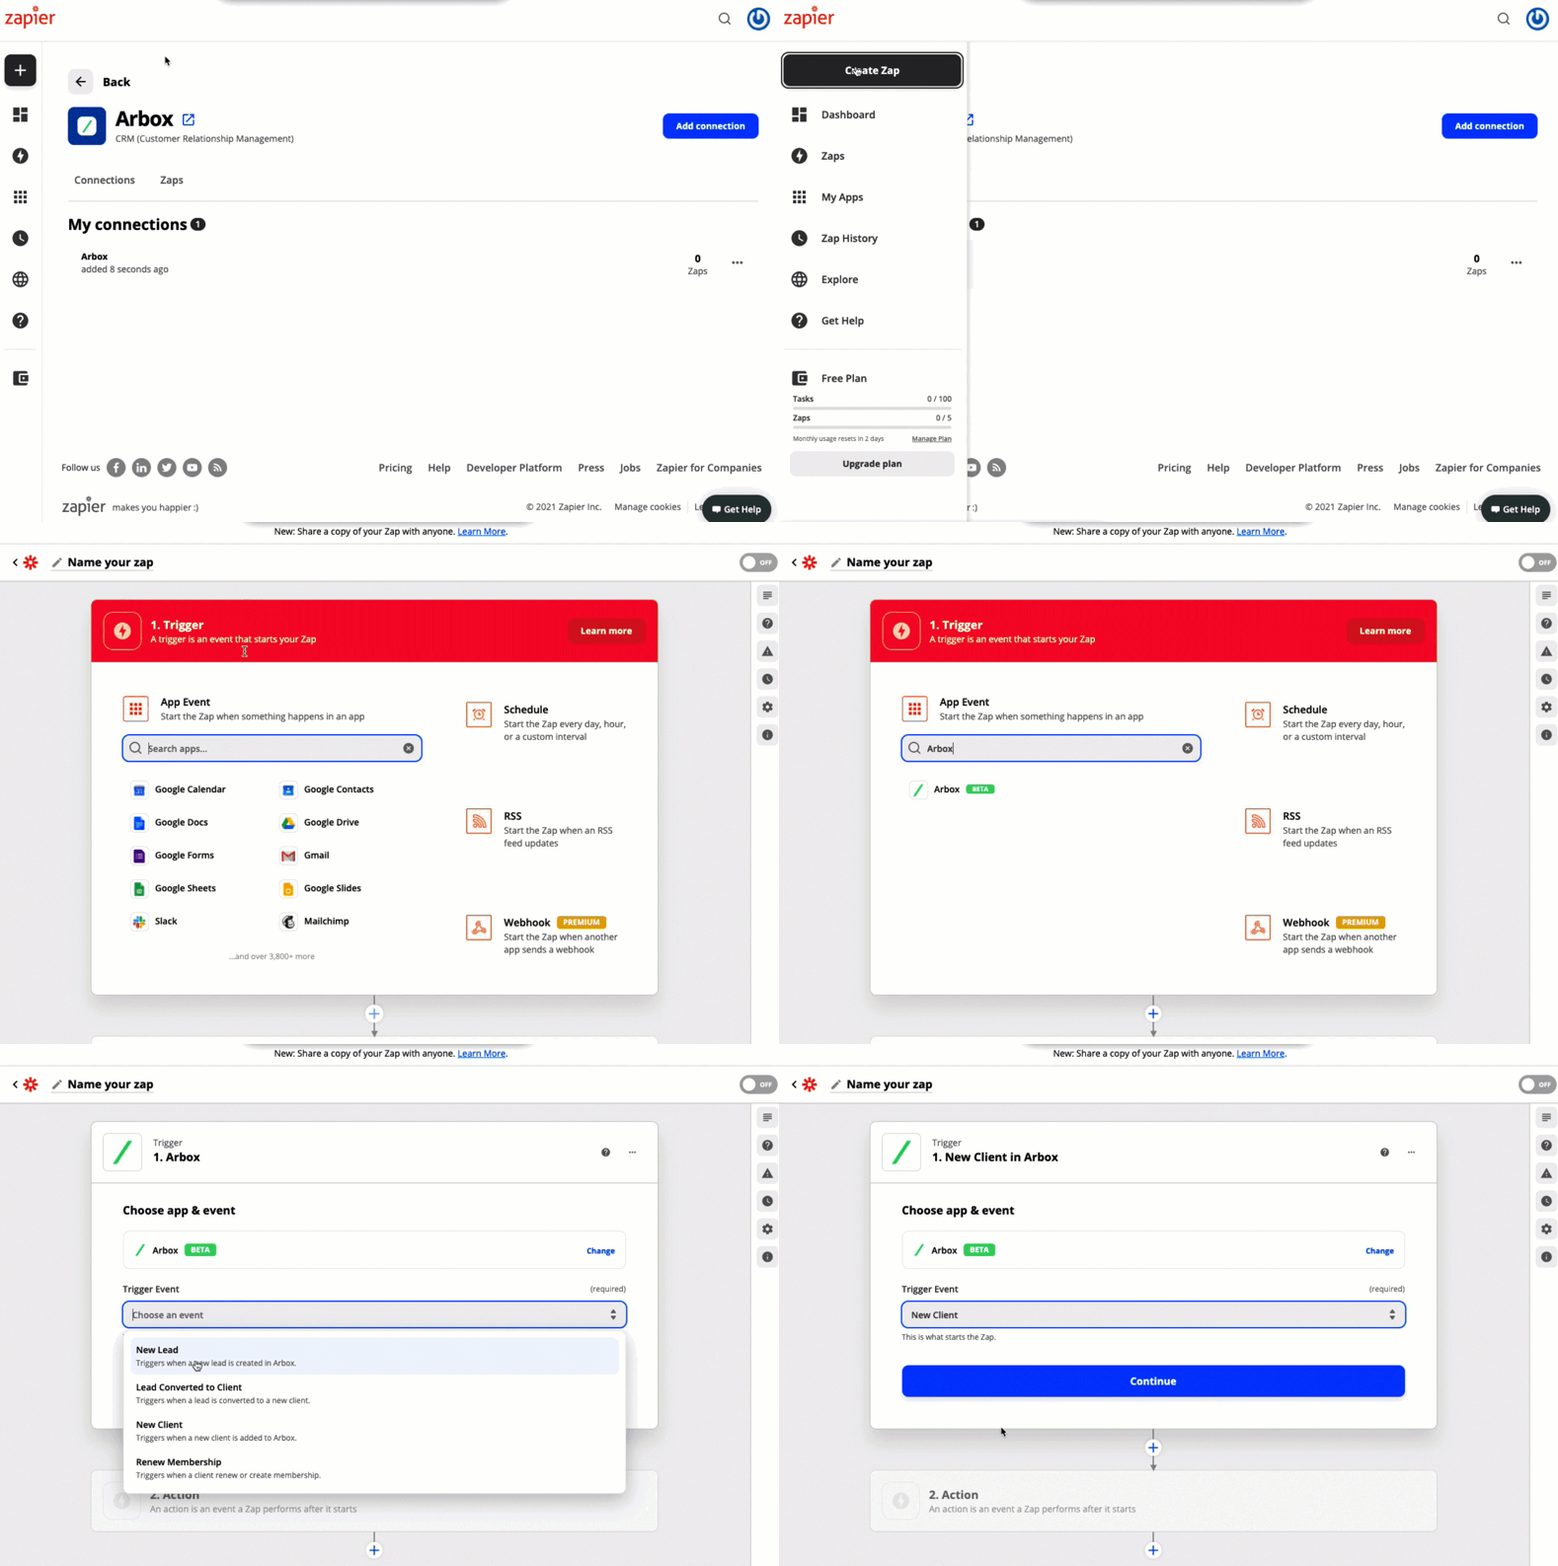
6. Back in Zapier, paste your Arbox API key to and click Continue,

7. Once that's done you can start creating an automation! Use a pre-made Zap or create your own with the Zap Editor.

.svg)

.svg)


.png)
.png)
.png)
.png)


.png)